
How to manually clean up a Distributed Virtual Switch (VDS) on an ESXi host?
If an ESXi host was connected to a Distributed Virtual Switch (DVS) and you were not able to properly remove it from the vCenter inventory, which cleans up the VDS as part of the removal, then you will be left with a stale VDS configuration.
Of course, the ideal workflow is to clean this up within vCenter Server but if you some how lost access or the vCenter Server was deleted and you might be wondering how to manually clean this up?
Step 0 – Ensure that no VMs or VMKernel interfaces are using the DVS and Distributed Portgroups (DVPG) resources. Re-create the vSphere Standard Switch (VSS) and the respective portgroups and reconfigure your VMs and VMKernel interfaces before continuing. If you need assistance, please search online as there are many resources that outlines these steps and this will no be covered in this article.
Note: In theory, after Step 0 you could technically jump to Step 5 and just delete the VDS database but I prefer to clean up resources prior to that step but this also works if you are in a pinch.
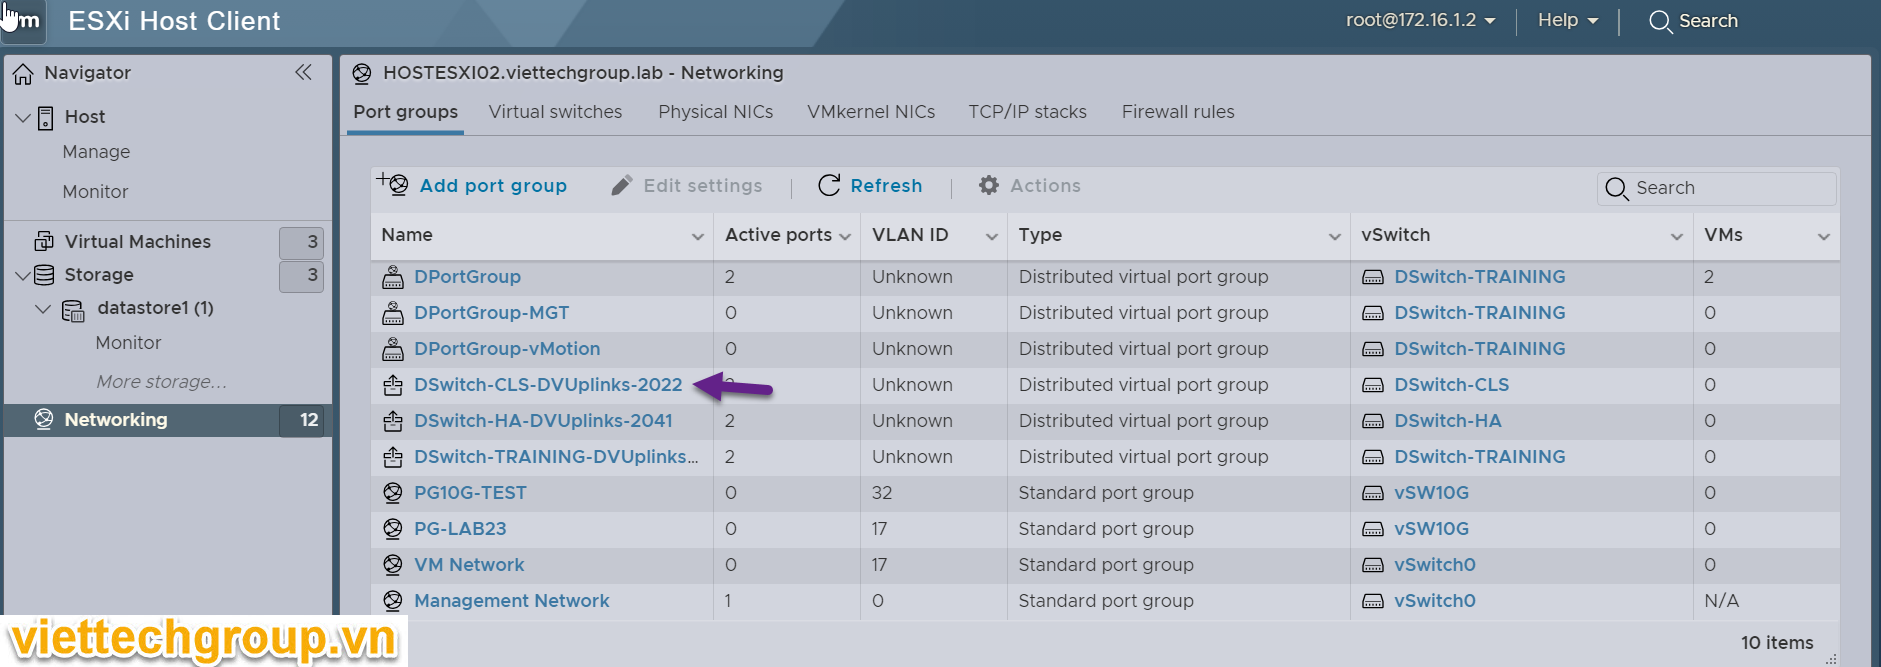
Step 1 – Run the following command to list current VDS and associated uplink ports that are configured. In the example below, I have a VDS named foo with a single uplink vmnic1 which is consuming port 9. Your environment may be configured differently, so please make a note of these values as you will need it in the next steps.
esxcfg-vswitch -l
Step 2 – Remove the uplink from VDS by running the following command and specifying the uplink, uplink port and VDS name.
esxcfg-vswitch –del-dvp-uplink=vmnic2 –dvp=4 “DSwitch-CLS”
[root@HOSTESXI01:~] esxcfg-vswitch –del-dvp-uplink=vmnic2 –dvp=4 “DSwitch-CLS”
[root@HOSTESXI01:~] esxcfg-vswitch –del-dvp-uplink=vmnic3 –dvp=4 “DSwitch-CLS”
[root@HOSTESXI01:~] esxcfg-vswitch –del-dvp-uplink=vmnic4 –dvp=0 “DSwitch-HA”
[root@HOSTESXI01:~] esxcfg-vswitch –del-dvp-uplink=vmnic5 –dvp=1 “DSwitch-HA”
[root@HOSTESXI01:~] esxcfg-vswitch –del-dvp-uplink=vmnic7 –dvp=49 “DSwitch-TRAINING”
[root@HOSTESXI01:~] esxcfg-vswitch –del-dvp-uplink=vmnic6 –dvp=48 “DSwitch-TRAINING”
Step 3 – Delete VDS by runnning the following command and specifying VDS name.
[root@HOSTESXI01:~] net-dvs -d DSwitch-HA
[root@HOSTESXI01:~] net-dvs -d DSwitch-TRAINING
[root@HOSTESXI01:~] net-dvs -d DSwitch-CLS
[root@HOSTESXI01:~] esxcfg-vswitch -l
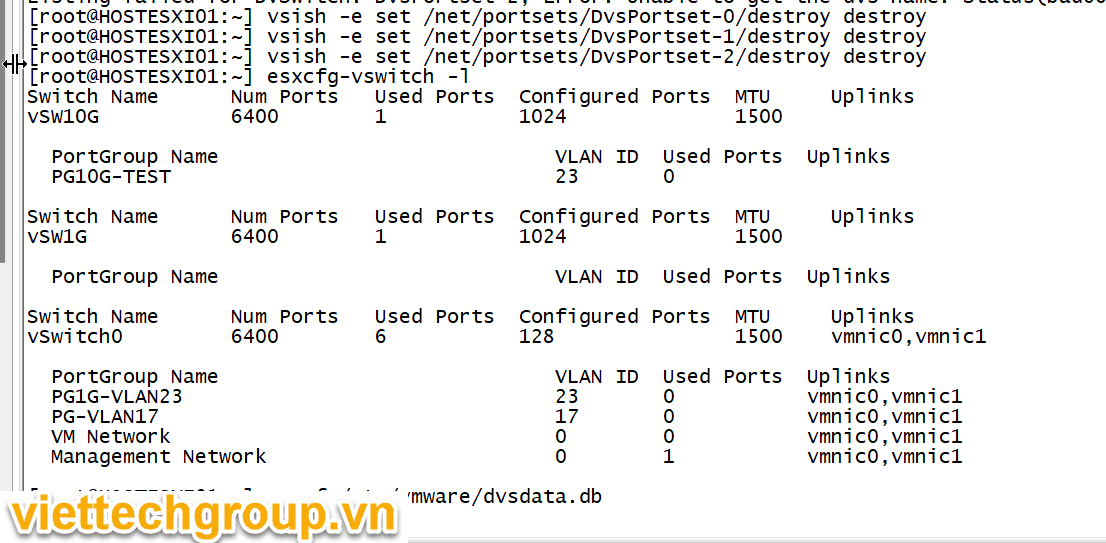
Step 4 – Depending on the number of DvsPortset-N, you will need to run this additional command and replace the N with value observed from previous step.
vsish -e set /net/portsets/DvsPortset-0/destroy destroy
vsish -e set /net/portsets/DvsPortset-1/destroy destroy
vsish -e set /net/portsets/DvsPortset-2/destroy destroy
Step 5 – Next, we delete the VDS database file which is needed or else VDS will be re-created upon the next reboot.
rm -f /etc/vmware/dvsdata.db
Step 6 – Finally, reboot the ESXi host and the VDS should now be completely removed.
Good luck
Phuong nguyen
Được đóng lại.