
This guide will cover how to install the File Server Resource Manager (FSRM) role service in Windows Server 2016 with both PowerShell and GUI methods.
FSRM is used to configure quotas, file screens, and storage reports on the file system in Windows.
Install with PowerShell
First we’ll start with PowerShell, as this is faster and easier than installing through the GUI.
Install-WindowsFeature -Name FS-Resource-Manager, RSAT-FSRM-Mgmt

A restart should not be required once this has completed. FS-Resource-Manager installs the FSRM role itself, while RSAT-FSRM-Mgmt installs the feature that you get prompted for during the GUI installation (covered below). Without RSAT-FSRM-Mgmt, you will not be able to access the GUI component to manage FSRM, which may be what you want on a server without a GUI. You would install the RSAT feature on a remote system and access the FSRM system remotely.
If you forget either of these feature names, you can run ‘Get-WindowsFeature’ instead, and scroll to the File and Storage Services section and see that it’s listed for File Server Resource Manager.
Install with GUI
Alternatively if you want to use the graphical user interface (GUI) to install this role you can use Server Manager instead, however there’s a bit more mouse clicking work involved here compared to simply running the PowerShell cmdlet above.
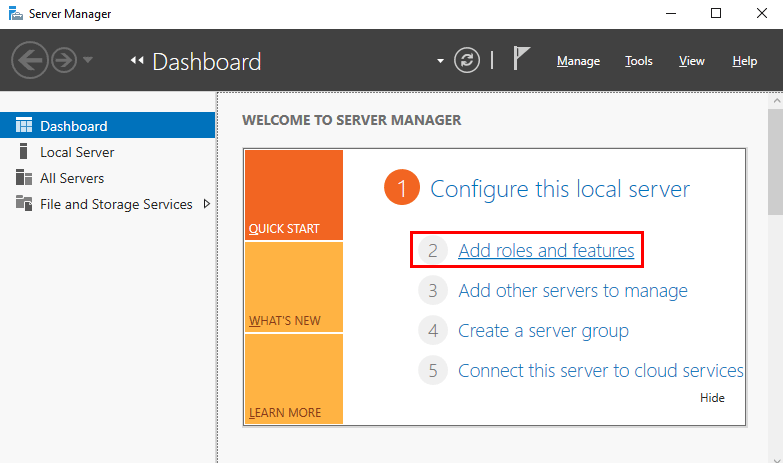
- From within Server Manager, select “Add roles and features”.
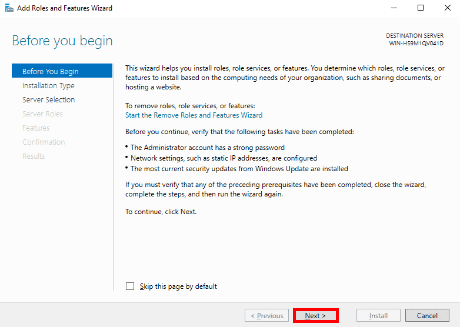
- The Add Roles and Features Wizard window will appear, click the Next button.
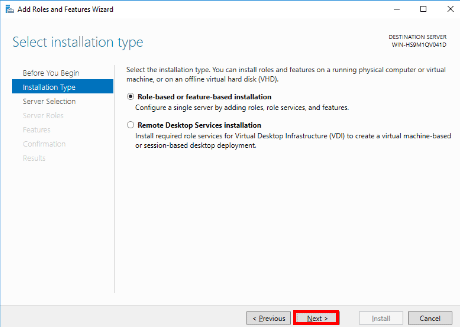
- On the Select installation type screen, leave Role-based or feature-based installation selected and click Next.
- On the Select destination server window leave everything as is as we’re installing to this server itself, so click Next to continue.
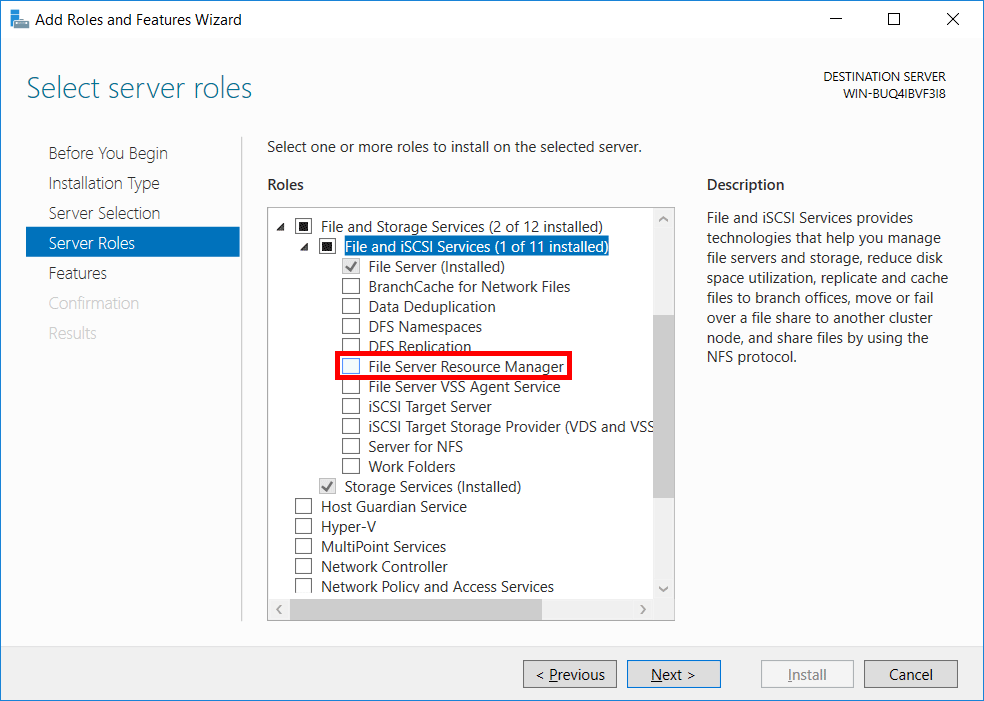
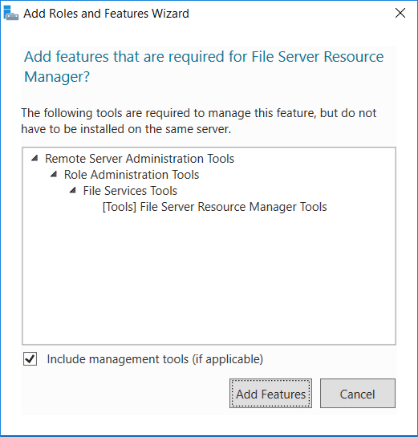
- From the select server roles window, scroll down and expand file and storage services, and then go into file and iSCSI services. From here select File Server Resource Manager. This is equivalent to using PowerShell to install FS-Resource-Manager as shown above.This will also ask if you want to add the File Server Resource Manager RSAT Tools, click to add the features.Click the Next button to proceed.
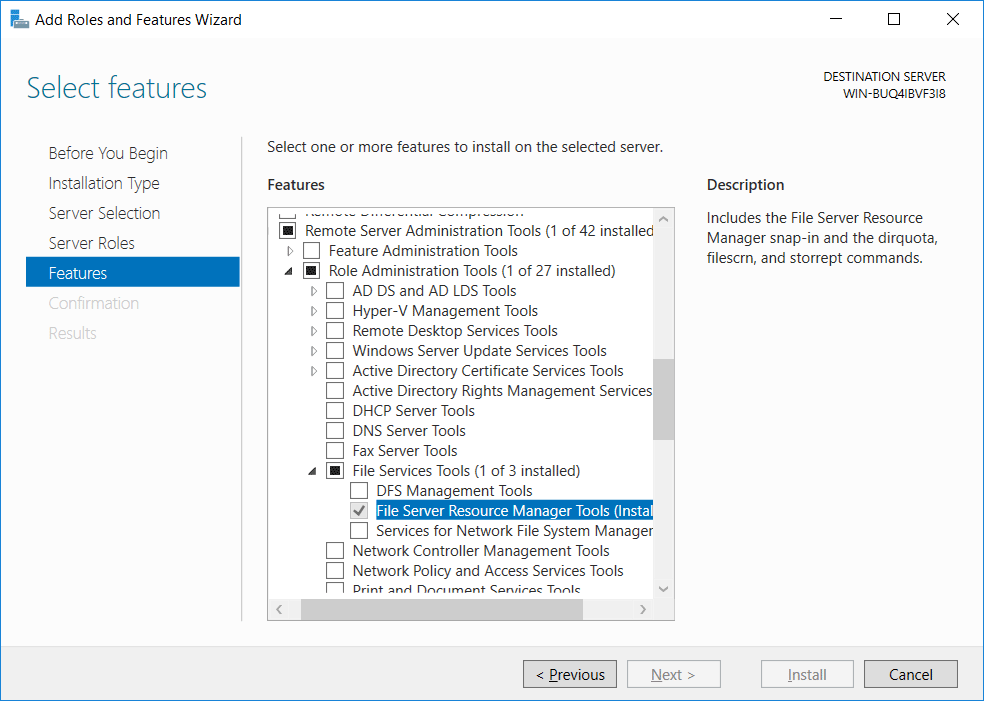
- On the select features screen simply click next without selecting anything, by default in the last step we chose to automatically add the suggested features already. We can see here that this is already selected for us. This feature is equivalent to using PowerShell to install RSAT-FSRM-Mgmt.
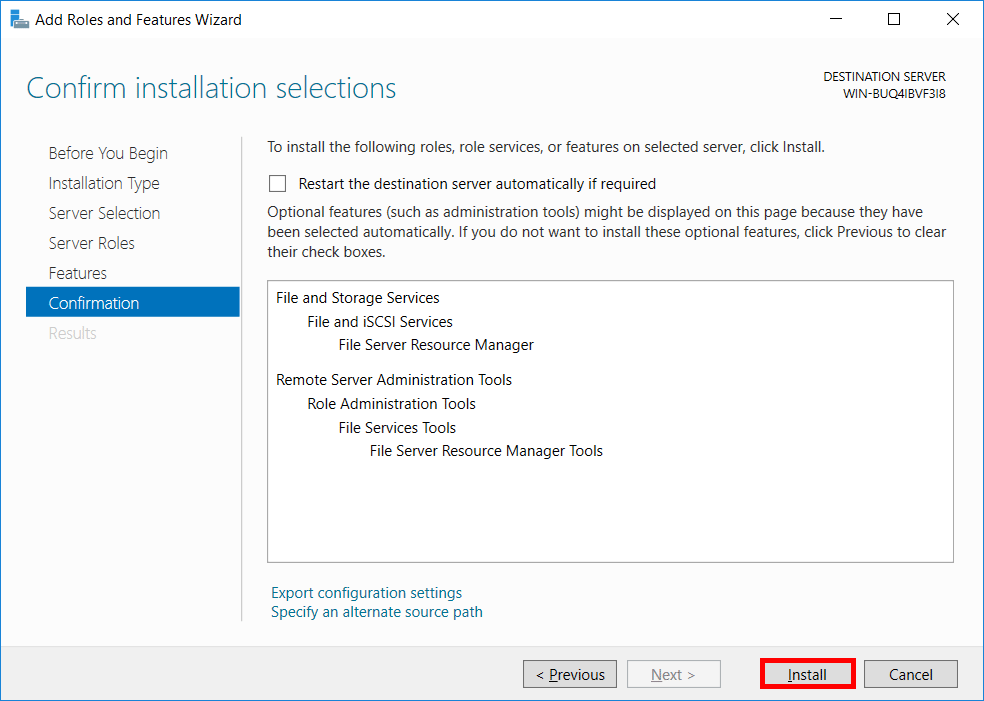
- On the confirm installation selections screen, review that you’re installing the File Server Resource Manager and File Server Resource Manager Tools and click install to continue.
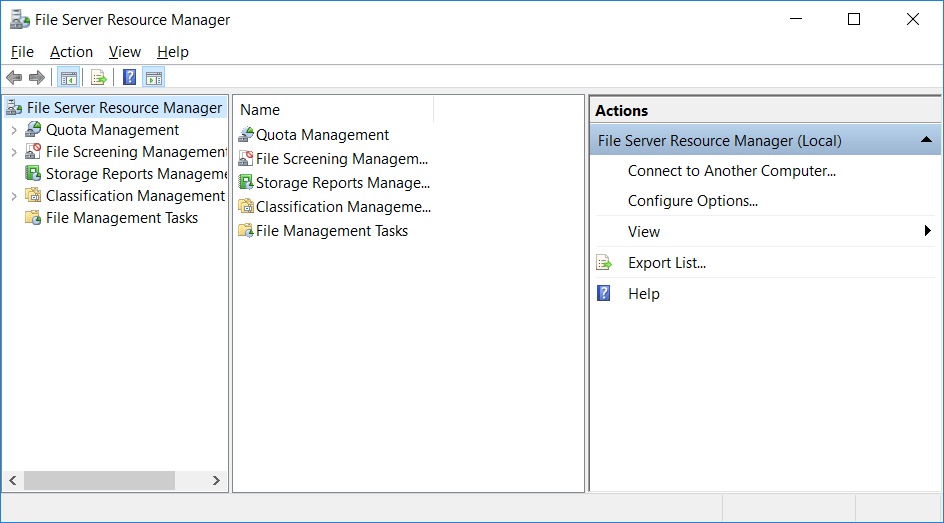
At this point we can open the FSRM window from Server Manager > Tools > File Server Resource Manager to configure and manage it through the GUI.
Summary
We can install the File Server Resource Manager (FSRM) role service in Windows Server 2016 using either PowerShell or the graphical user interface. Personally I prefer using PowerShell, as it’s a lot quicker to complete the task, however you can use either method to get the job done.
Source: https://www.rootusers.com/install-file-server-resource-manager-fsrm-role-in-windows-server-2016/